


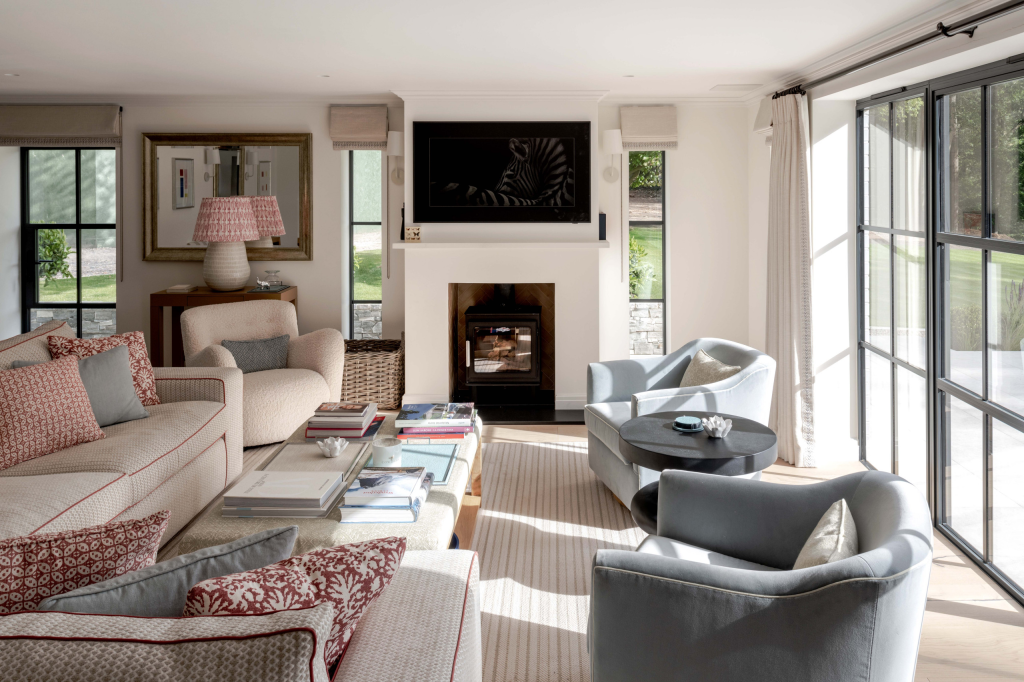
We moved into a narrow, south-facing row house this year and fell hard for the high ceilings, original woodwork and a coffee-sipping front porch. The catch? Not a ton of natural light—especially in the one-window living room—plus dark paint and heavy window treatments that made everything feel, well, like a cave. With a target budget of $1,000, we launched Operation Lighten Up. Below is exactly what we did, what we’d tweak, and the research-backed why behind each choice (bc good design + good data = happier rooms).
The Constraints (and Opportunities) of a South-Facing Row House
South-facing windows in the Northern Hemisphere can deliver great daylight, but tree-lined streets, narrow setbacks and deep floorplates reduce how much light actually reaches your walls. Orientation is only part of the story—visible transmittance of glazing, shading from trees/buildings and interior surface reflectance matter just as much. The upside: small, smart changes can dramatically increase perceived brightness without major renos.
- Daylight is cut by exterior shading and window layers; even dirt and insect screens reduce visible transmittance. See window science from Lawrence Berkeley National Laboratory: LBNL Windows & Daylighting.
- Light-colored, higher reflectance surfaces bounce light deeper into a space. Learn what LRV (Light Reflectance Value) means via Sherwin-Williams: What is LRV?.
- Warm white LEDs (≈2700–3000K) feel cozy; using dimmers at night also reduces blue light exposure, which can support better sleep hygiene. Background reading: Harvard Health: Blue light & sleep.
Step 1: Repaint With a High-LRV Warm White (Approx. $150)
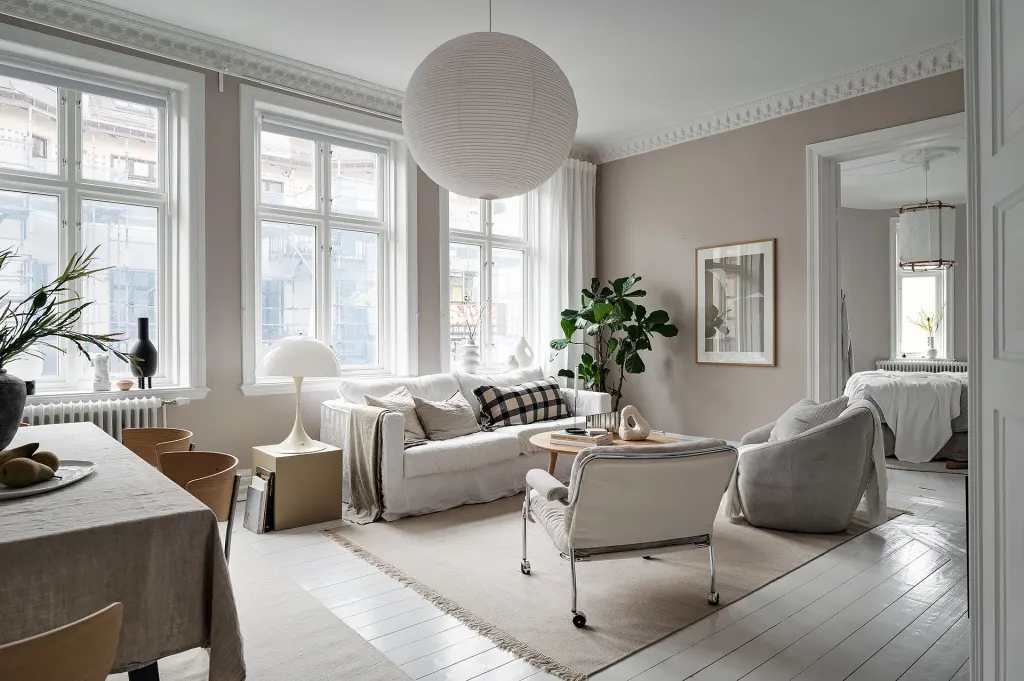
The first thing we did was banish the sickly tan. We wanted “white,” but not stark or clinical. We chose a warm linen tone (think soft ivory) and it immediately brightened the room. In retrospect, I wish we’d gone a hair whiter—target an LRV in the low-to-mid 80s if your room is truly light-starved. Eggshell or matte with scrubbability helps diffuse glare and hides wall texture.
- What to look for: LRV ≥ 80; undertone skewing warm (a touch of yellow/red) to counter green cast from trees.
- Finish: Eggshell or matte that’s washable. Glossier paints reflect more but can create shiny hot spots.
- Supplies & cost: Warm white + primer and basic supplies ran about $150 for our space.
Nerd note: Lighter walls increase inter-reflection and make the whole room feel brighter even if the daylight hasn’t technically increased. That’s not just vibes—it’s basic optics. More here on interior reflectance and light distribution: Lighting Research Center.
Step 2: Swap the Heavy Fan for a Multi‑Light Chandelier + Dimmer (≈$480)
Because natural light is limited, the ceiling fixture has to do double duty: bright, even ambient light when you need it, and warm, dimmable glow at night. We replaced the bulky wood-blade ceiling fan with a 12‑light Sputnik-style chandelier and added a compatible dimmer. The many bulbs spread light in all directions so it washes the ceiling and walls, which increases perceived brightness without feeling harsh.
- Dimmers: Make sure the dimmer is LED-compatible (ELV or listed for the bulbs you buy) to avoid flicker. See DOE: Lighting controls and NEMA on LED dimming.
- Ceiling fan tradeoff: If you need air movement, choose an ENERGY STAR certified low-profile fan with an integrated LED instead of a chandelier. Fans info: ENERGY STAR ceiling fans.
Cost reality check: Our chandelier was about $400 plus $80 to have it installed and put on a dimmer. Not cheap, but it transformed the space. And yes, we kept a small, quiet floor fan tucked away for heat waves.
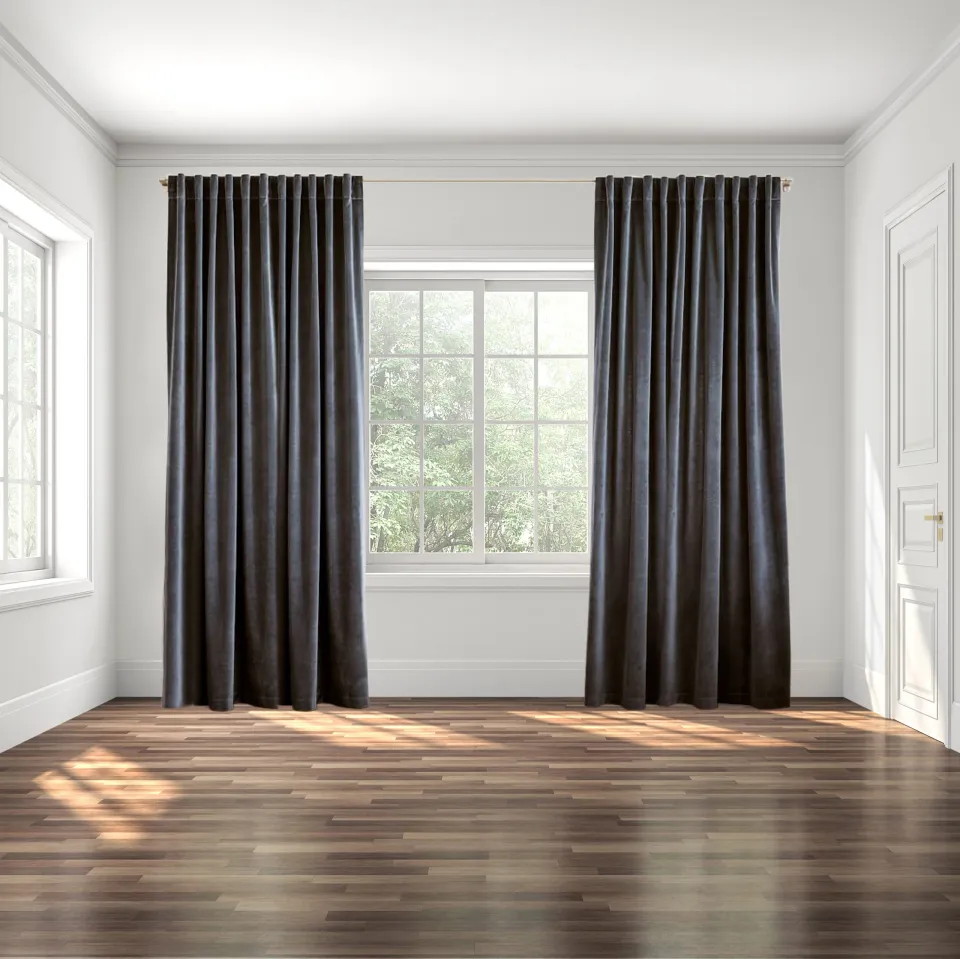
Step 3: Modern Layered Window Treatments + Curtains Hung High and Wide (≈$446)
The house’s arts-and-crafts woodwork is gorgeous—and quite dark. I wanted to paint it (honstly), but my partner argued for preserving the original finish. Compromise: lighten the window visually. We swapped dark slatted blinds for a crisp white layered shade, then added light-toned curtain panels hung high and well outside the window frame. That draws the eye up, frames the view and reduces how much dark trim you take in at once.
- Mounting rules of thumb: Hang rods 4–6 inches above the top trim (or just below crown) and extend 8–12 inches past each side so panels can stack off the glass. This “high and wide” trick makes the window feel larger. Practical measuring guides: This Old House: How to hang drapes.
- Energy and comfort: Layered shades and thermal-lined curtains can reduce heat loss/gain and glare. See DOE: Window upgrades & coverings.
- Privacy vs daylight: Consider top‑down/bottom‑up shades to keep privacy while borrowing sky light.
Our actual spend: layered shade ≈$230; two light curtain panels ≈$216. We placed the rod so curtains cover most of the dark side jambs when open—instant bright frame.
Budget Snapshot (Approximate, pre‑tax)
- Warm off‑white paint + primer + supplies: $150
- 12‑light chandelier: $400
- Pro installation + LED‑compatible dimmer: $80
- Layered window shade: $230
- Two curtain panels: $216
- Total: $1,076 (a smidge over the $1,000 target—shipping/tax add up—but still less than most new sofas)
Note to self: If you must trim costs, keep the existing fan and simply add a large LED drum shade over it, or start with curtains only (they’re doing more visual heavy lifting than you’d think).
What Changed (Beyond Vibes)
- Perceived brightness: Lighter walls (higher LRV) bounce daylight and fixture light back into the room, reducing contrast. If you want to quantify, a free lux-meter app can help you compare before/after at the sofa and coffee table. Why this matters: LRC resources.
- Color quality: CRI ≥90 LEDs make wood tones look richer (not muddy) and textiles more accurate. See DOE: Lighting choices.
- Glare control: Sheers + layered shade soften midday sun while keeping the room bright, which reduces visual fatigue. Basic glare discussion: LBNL Windows.
Pro Tips if Your Living Room Still Feels Dim
- Layer the light: Add a floor lamp behind the sofa and a table lamp in the darkest corner. Aim for warm 2700–3000K, high CRI bulbs across the room so the color feels consistent. More on residential layering: DOE Lighting Basics.
- Mirror, but smartly: Place a mirror perpendicular to, not directly facing, the window to bounce light deeper without reflecting glare. Basic placement guidance: This Old House.
- Declutter the glass: Clean windows, remove storm panels seasonally, and consider a higher-VT screen. Even dust affects daylight transmission; intro to VT: NFRC ratings explained.
- Light rugs and textiles: A pale rug with a low-contrast pattern brightens the floor plane and reduces the “dark box” effect.
- Mind the bulbs: Mix of omnidirectional A19s for lamps and globe/G16s for chandeliers; keep the same CCT and brand to avoid mismatched whites.
- If you keep the fan: Choose a model with a bright, high-quality integrated LED and a high CFM per watt (efficiency). Check ENERGY STAR listings.
Historic Woodwork: Paint or Preserve?
We left the original wood trim unpainted to respect the home’s era. If you’re tempted to paint (I was), consider reversible options first: lighten the surrounding planes, then minimize visual weight with high-and-wide drapery and lighter shades. If you do refinish or paint, read up on best practices for historic interiors: National Park Service Technical Preservation Services.
The Curtain Tip You Actually Need
Hang them higher and wider than you think: 4–6 inches above the window (or to the ceiling) and at least 8–12 inches beyond each side. This makes the window feel bigger, stacks fabric off the glass for maximum light, and hides a lot of dark trim. A quick refresher with diagrams: This Old House.
What I’d Do Differently Next Time
- Go slightly brighter on paint—still warm, but with an LRV 2–3 points higher.
- Choose a dimmer with preset scenes (reading, movie, cleaning). Tiny upgrade, big daily joy.
- Top‑down/bottom‑up shade for privacy + sky light. It’s worth the extra $ if your window faces the street.
- Add a plug‑in picture light over art to double as an ambient uplight—cheap lumens where you need them.
Shopping & Spec Checklist
- Paint: Warm white/off‑white, LRV ≥80; eggshell or washable matte. Learn LRV: Sherwin-Williams.
- Bulbs: LED, 2700–3000K, CRI ≥90, dimmable, flicker-minimized; ENERGY STAR label preferred: ENERGY STAR bulbs.
- Dimmer: Listed as compatible with your specific LEDs (check the dimmer’s compatibility sheet). Basics: DOE Lighting Controls.
- Window treatments: Light-filtering layered shade + light curtain panels; mount high and wide. Energy savings context: DOE: Efficient window attachments.
Pretty cheerful, right? And we did it for about the cost of a single nice sofa cushion (ok, several). If your place is feeling dim or a tad gloomy, start with paint and curtains—those two alone can be a night-and-day change. Then let your ceiling fixture and bulbs do the rest, carefully.
Further Reading & References
- DOE Energy Saver: Lighting choices that save money, LED Lighting, Lighting Controls, Efficient Window Attachments
- Sherwin-Williams on LRV: What is LRV?
- Lighting Research Center (RPI): Residential lighting resources
- Harvard Health: Blue light’s impact on sleep
- This Old House: How to hang drapes, Fast fixes to brighten a room


