


You can love your home and still crave a seasonal reset. Spring is a great excuse to do it—but you don’t need to replace the sofa or start a renovation. With five small adjustments (plus a couple of smart add‑ons), you can shift a space from warm and cozy to light and airy in under an afternoon. Below, I reorganized the original five steps into a more complete, practical guide, added what actually matters (facts, safety notes, and a few pro tips), and sprinkled in real‑world examples. Honestly, you don’t have to do everything—choose the two or three that fit your budget and schedule and call it a day.
Quick note on indoor air and lighting (because they’re the biggest “feel” shifters): ventilation and light quality often change your perception of a room more than color alone. The U.S. Department of Energy has a simple rule: shop bulbs by lumens (brightness), not watts, and mind color temperature for mood. See DOE’s LED guide for a quick refresher (energy.gov; also Energy Saver). And if you bring scent into the mix, do it thoughtfully—fragrances and air fresheners can contribute volatile organic compounds (VOCs), which some folks are sensitive to (NIOSH/CDC, EPA on VOCs).
Step 1: Refresh the scent (and the air) the smart way

Grab a reputable plug‑in scented oil diffuser in a clean, airy profile (think “fresh linen” or “cotton”). Adjust the warmer so it gently scents the room rather than overpowering it—you want an undertone, not a perfume counter. If you prefer natural options, a bowl of citrus peels near a sunny sill or a very light essential oil diffusion (5–10 minutes, then off) can do the trick. That said, fragrance is personal: some people love it, some dont.
Safety and science bits (worth the minute):
- Ventilation first. Crack a window when the weather cooperates; increasing outdoor air exchange is the EPA’s top‑line indoor air recommendation (EPA).
- Be mindful of sensitivities. Fragrances can aggravate asthma and migraines in some individuals (NIOSH/CDC; AAAAI).
- Houseplants? Beautiful, but not a silver bullet for air cleaning. The famous NASA 1989 study was in sealed chambers (NASA), and more recent analysis shows plants don’t significantly purify air at real‑home ventilation rates (Waring & Siegel, 2019).
- Quick allergen win: a HEPA vacuum pass on rugs/soft goods plus a microfiber dust of horizontal surfaces reduces dust and dander that blunt that “fresh” feeling (EPA: Guide to Air Cleaners, EPA on dust mites).
Step 2: Flip your rug (when it’s actually reversible) to soften the palette

This tip rules—if your rug is a reversible flatweave (like many kilims, dhurries, or braided rugs), turning it over reveals softer, more muted tones due to wear and dye saturation differences. That instantly calms the color noise and makes the room read lighter.
But don’t flip every rug. Skip this for tufted or latex‑backed rugs (the backing isn’t meant for foot traffic). Add a non‑slip pad under any rug to prevent sliding and trip hazards—falls are no fun, and pads also improve underfoot feel (CPSC home safety, Carpet & Rug Institute: care).
Two cleanup extras for brightness:
- Vacuum in both directions to lift more dust (CRI suggests slow, overlapping passes) (CRI).
- Wash sheer curtains and clean the inside of your windows—more visible light gets in when glass and fabrics aren’t dusty (LBNL Windows group on daylighting fundamentals).
Step 3: Update the art—real photos in those frames, or swap dated pieces

Those empty frames you’ve been meaning to fill? Print a handful of personal photos with lots of sky, water, or open space; images with higher “visual lightness” reduce perceived clutter on the wall. Not into photos? Try line drawings, botanical studies, or maps—quiet, graphic pieces read airy. There’s also decent evidence that nature imagery can lower stress and improve mood, even in clinical settings (Center for Health Design; classic background: Ulrich, Science 1984).
Hanging hacks:
- Eye level is your friend—roughly 57–60 inches from floor to the center of the artwork is a common gallery standard (aim for consistency across a wall).
- Use lighter mats/frames to bounce more light vs heavy dark frames that visually “box in” the piece.
- Try a 60–30–10 palette rule across the wall (60% light neutrals, 30% mid tones, 10% accent) to keep things breezy.
Step 4: Swap dark accents for light neutrals (yes, blue can be a neutral)
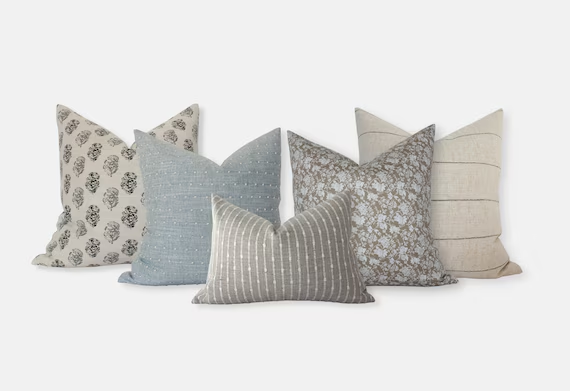
Accent items carry huge visual weight. Trade charcoal pillows, heavy throws, and dark ceramics for light neutrals—ivory, oatmeal, pale stone, greige, and soft blues. Blues function as a “near‑neutral” in many rooms because they recede visually and pair with almost everything. If you want something a tad nerdy to guide choices, peek at Light Reflectance Value (LRV): higher LRV surfaces reflect more light back into the room and feel brighter. Walls and large accents with higher LRV will brighten the envelope (WBDG: Lighting principles), and color‑emotion research consistently finds blues and light tones are perceived as calmer and more open (Frontiers in Psychology).
- Textiles: swap in linen or cotton weaves with a bit of texture so the room doesn’t go flat.
- Hard goods: pale wood trays, off‑white vases, or clear glass objects lighten coffee tables fast.
- Mirrors: even a small mirror opposite a window multiplies daylight; keep glare in check by angling away from direct sun (LBNL Daylighting).
Step 5: Brighten the room (literally) with higher‑lumen, better‑quality light
This is the biggest bang‑for‑buck change. Replace underpowered bulbs with LEDs that deliver more lumens (brightness), not more watts. For a living space targeting an airy daytime feel, try:
- Brightness: roughly 800–1,100 lumens per lamp for table lamps and 1,500–2,000 lumens total per task zone; scale up for large rooms (DOE guidance: shop by lumens, not watts: Energy Saver).
- Color temperature: 3000–3500K for a crisp yet warm “spring day” vibe; go 4000K where you need extra clarity (kitchens, desks). Avoid overly cool 5000K+ in cozy areas unless you love a daylight look at night.
- Color rendering (CRI): aim for CRI 90+ so colors look true and artwork doesn’t turn muddy (Illuminating Engineering Society).
- Dimming and layers: combine an overhead, a floor lamp, and a table lamp so you can nudge brightness where you need it (IES: lumens).
Nighttime tip: brighter, cooler light late in the evening can nudge your circadian rhythm the wrong way; dim and warm it down near bedtime (NIH: light and circadian rhythms; a readable summary from Harvard Health here).
Bonus micro‑tweaks that amplify “light and airy” fast
- Declutter the “visual horizon”: Clear the top of the coffee table and the back of the sofa; leave 3–5 intentional items max. Negative space = oxygen for the eyes.
- Swap heavy throws for a single light one draped loosely—it’s a styling cliché because it works.
- Sheers and rods: move curtain rods closer to the ceiling and extend them wider than the window so panels don’t block glass when open (more glass visible, more light).
- Switch plates and outlet covers: yellowed covers subtly darken walls; fresh white or matching paint covers can lift the look for a few dollars.
- If you burn candles, pick unscented and keep them away from return vents; all combustion adds particulates indoors (EPA IAQ).
Shopping checklist (30 minutes, under $100–$200)
- 2–4 LED bulbs, 800–1100 lumens, 3000–3500K, CRI 90+ (look for ENERGY STAR to keep quality consistent: ENERGY STAR).
- Two light/neutral pillow covers + one breathable throw.
- Non‑slip rug pad (trim to size).
- 2–6 photo prints (matte finish often looks more refined under glass).
- Microfiber cloths and a HEPA vacuum bag/filter if needed.
- Optional: a subtle “clean linen” type plug‑in or a small bouquet of fresh greens.
My two cents after doing this in clients’ homes: if you only pick one upgrade, do lighting. If you pick two, do lighting + accent swap. The perceived square footage jumps, silly as that sounds.
Timeline: a realistic 60–90 minute plan
- Minutes 0–10: Open windows, gather tools, pull dark accents to one side.
- Minutes 10–25: Replace bulbs, set color temp, test dimmers.
- Minutes 25–40: Rug check and flip (if reversible) + quick vacuum both directions.
- Minutes 40–55: Swap in light pillows/throws, place a mirror if you have one.
- Minutes 55–75: Hang or rearrange art, drop personal photos into frames.
- Minutes 75–90: Light tidy, wipe window interiors, set scent to low. Done.
Pitfalls to avoid (learned the hard way): don’t over‑brighten with 5000K everywhere (it can feel sterile at night), don’t flip non‑reversible rugs (backings will wear out), and don’t over‑scent—our noses fatigue and you’ll keep turning it up. Better to underdo and enjoy.
Sources and further reading
- Indoor air quality basics and VOCs: EPA; EPA on VOCs
- Rug safety and care: CPSC: Home safety; Carpet & Rug Institute
- Daylighting fundamentals: LBNL Daylighting; broader design/lighting principles: WBDG
- Nature, art, and wellbeing: Center for Health Design; classic study: Ulrich (1984)
- Plants and indoor air: NASA Clean Air Study (1989); real‑home context: Waring & Siegel (2019)
If you made it this far, you’re already ahead. Pick a scent (or not), flip the rug (if reversible), swap a few accents, and upgrade those bulbs. Ten out of ten times the room will feel bigger, brighter, and a little more like fresh air. And hey—if a pillow looks wrong, it probably is. Trust your eye.


